Easily Import AWS Resources into Terraform
Use newly released import blocks to simplify resource importing for IaC management.


PermalinkBackground
Feel free to directly move on to the next section for the walkthrough of using the
importblocks.
In one of the last chunks of the Cloud Resume Challenge project, it is required to use an IaC tool as part of automating the CI/CD pipeline. I decided to learn and use Terraform to provision AWS resources for the project. While doing so, I believed that I needed to manually destroy my current resources and to provision them again using Terraform and this is something that I could not fathom doing without searching for a simpler solution. It simply makes sense to learn how to import resources since realistically speaking, it would be highly impractical for any business to have to stop their current resources and wait for the Terraform provisioned counterparts to run.
Thus, I made a significant effort to find an easy way to import existing AWS resources into Terraform. The first avenue to explore was within Terraform itself and I found that most examples and tutorials that could be found were on using the terraform import command which I found to be too tedious to utilize. So I sought again and found Terracognita which does an amazing job of importing AWS resources. But, I found that the simplicity of the tool abstracted too much of the importing process.
I went back to Terraform again and as I thought to finally settle with the import command, I stumbled upon import blocks which have only been included in a June release of Terraform.
PermalinkA New Import Method
In a recent release (v 1.5) of Terraform, import blocks have been added which make the adoption of existing AWS resources much simpler. The former and still available method of importing AWS resources requires that each one has a matching import and be checked for configuration drift. This process becomes quite tedious if there are quite several resources to import. An article by Spacelift outlines this well and takes about 6 steps to complete from writing the initial configuration.
The new method simply requires an import block to be declared and then to run a terraform plan -generate-config-out=generated_resources.tf which generates the resource blocks for review. It automatically creates resource blocks for each declared import resource and does bulk importing of those resources after apply. This eliminates the need to run an import for each resource and may lessen the need to check each configuration for drift.
PermalinkWalkthrough
Let's explore the new import method with a simple example using S3. The configuration of the s3 bucket will be changed after import and the sample object will be changed as well to demonstrate how to include a file after import of the S3 bucket.
Permalink1. Setup System Requirements
Use Terraform v1.5
Make sure that Terraform at least Terraform 1.5 is installed on the machine. Use
terraform --versionto check. This is an essential step that I assumed to have already been using. I spent some time trying to troubleshoot the errors that arose simply because I was not using the latest version. Check the applicable upgrade instructions if needed.Setup Temporary AWS Credentials
I used KodeKloud's Playground for this sample where I am able to use an access key and a secret access key acquired from IAM. It is the same for a personal account. As best practice, those keys are not to be included in the Terraform code. And as my access is transient, my credentials are set only as environment variables.
  $ export AWS_ACCESS_KEY_ID="anaccesskey"
  $ export AWS_SECRET_ACCESS_KEY="asecretkey"
  $ export AWS_REGION="us-east-1"
Permalink2. Create the initial S3 bucket
This can be done manually through the console or to save time, use Terraform to provision and then use another directory to sample the import. The latter will be sampled here.
Create Terraform config files
🗄️ kk-s3-sample ┣ 📁 main.tf ┣ 📁 provider.tf ┗ 📁 test-file.txtresource "aws_s3_bucket" "test_bucket" { bucket = "tf-import-test-bucket" } resource "aws_s3_object" "hello_world" { bucket = aws_s3_bucket.test_bucket.id key = "test-file.txt" source = "test-file.txt" etag = filemd5("test-file.txt") } output "s3_hello_world_file" { value = aws_s3_object.hello_world.etag description = "Etag of test-file.txt for version comparison" }terraform { required_providers { aws = { source = "hashicorp/aws" version = "~> 4.0" } } } # Configure the AWS Provider provider "aws" { region = "us-east-1" }test-file.txt
HELLO WORLD! File version 1.Run
terraform init,planand,applyto create the bucket and check if created usingaws s3 lsin the CLI. After running apply, the output should look like this: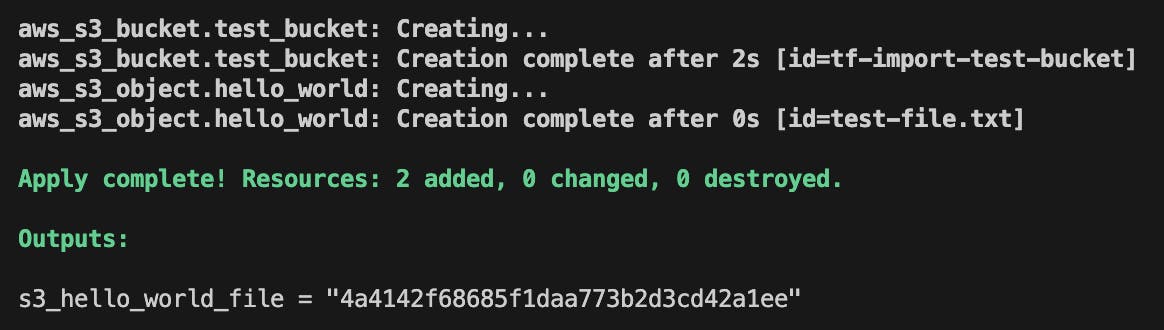
Verify using the
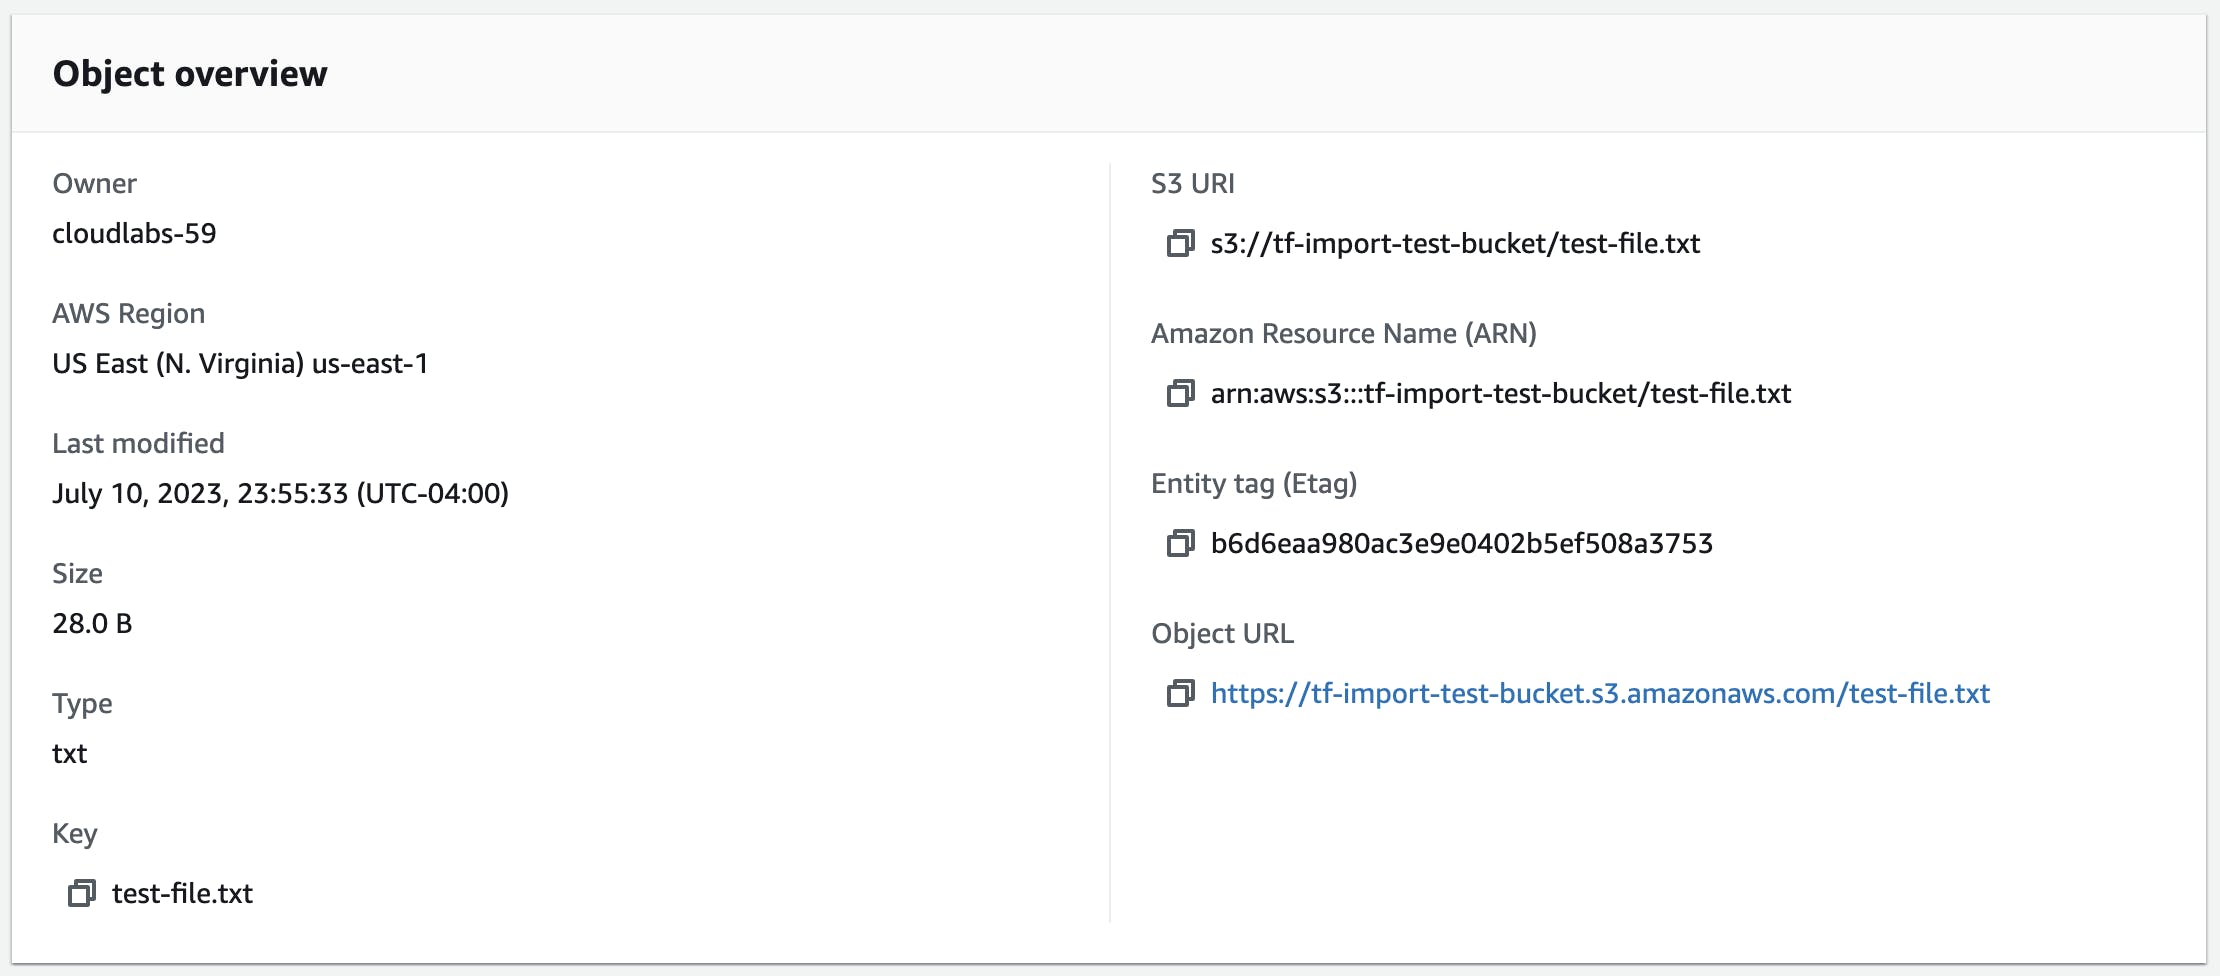
aws s3 lscommand and subsequently theaws s3 ls s3://[bucket name] --human-readablecommand to check the content of the bucket. Outputs should look like the following.

Note the md5 hash of the text file and as well as the bucket name which is used in the following sections.
Permalink3. Import the created S3 bucket into a new directory
Create directory and config files for import
🗄️ kk-s3-sample-import ┣ 📁 imports.tf ┗ 📁 provider.tf- Should there be many resources to import, all could be placed in this file.
import {
to = aws_s3_bucket.test_bucket
id = "tf-import-test-bucket"
}
  terraform {
    required_providers {
      aws = {
        source  = "hashicorp/aws"
        version = "~> 4.0"
      }
    }
  }

  # Configure the AWS Provider
  provider "aws" {
    region = "us-east-1"
  }
Run the
terraform initandterraform plan -generate-config-out=generated_resources.tfThis will generate the resource configuration for the s3 bucket indicated in
imports.tf.generated_resources.tf
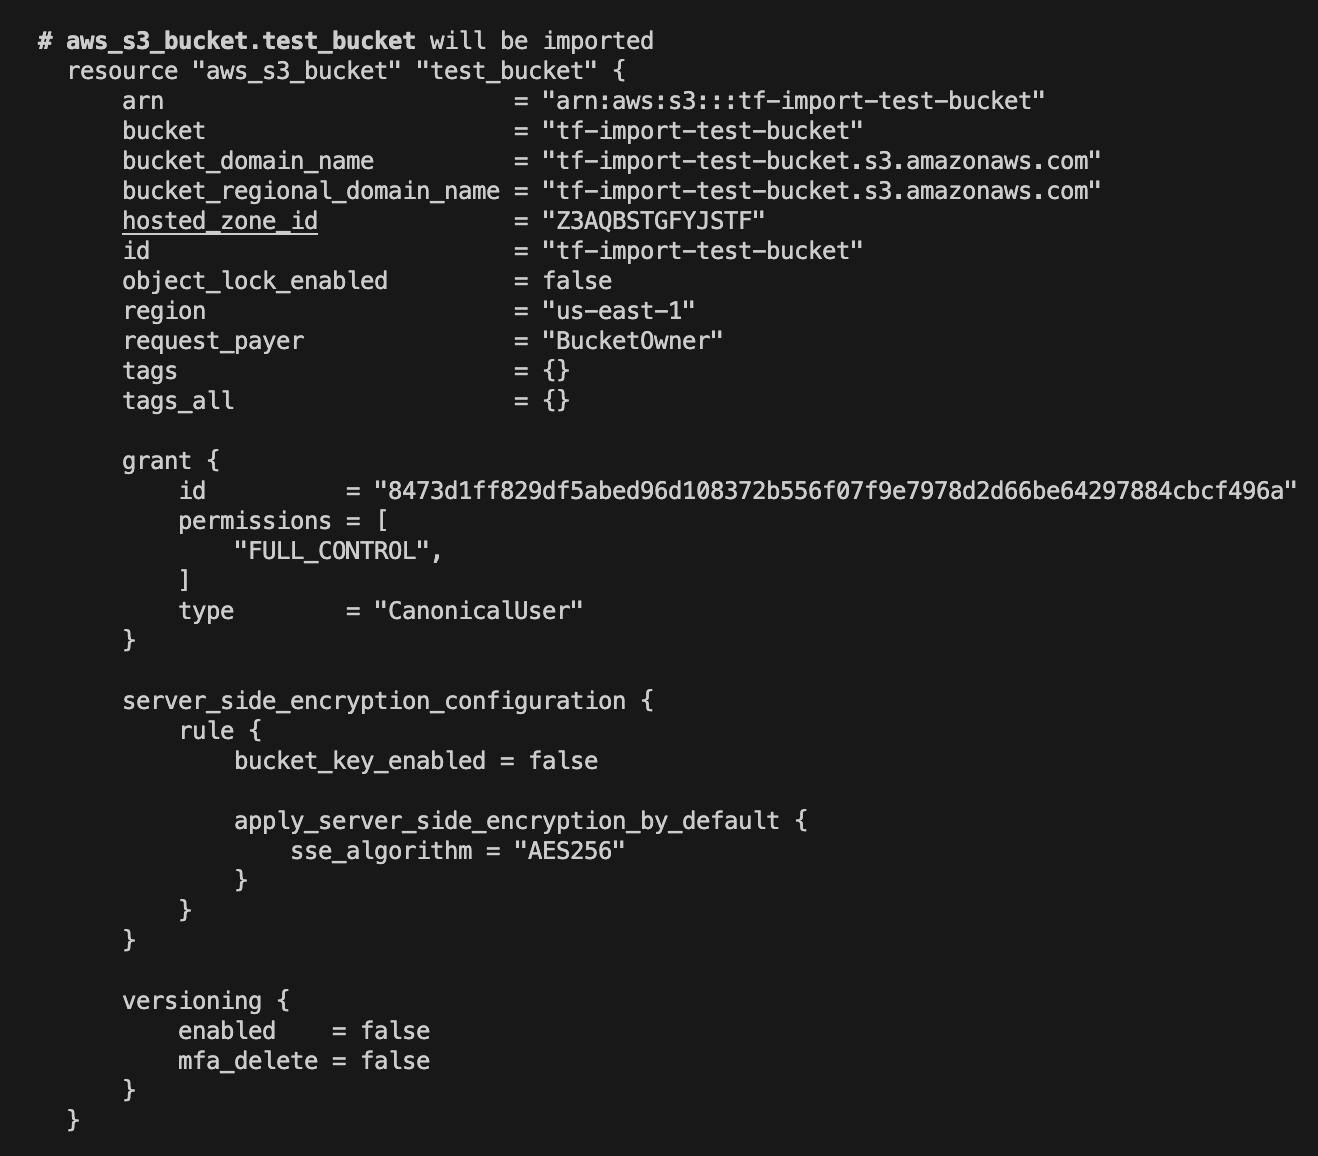
  # __generated__ by Terraform
  # Please review these resources and move them into your main configuration files.

  # __generated__ by Terraform from "tf-import-test-bucket"
  resource "aws_s3_bucket" "test_bucket" {
    bucket              = "tf-import-test-bucket"
    bucket_prefix       = null
    force_destroy       = null
    object_lock_enabled = false
    tags                = {}
    tags_all            = {}
  }
Also, this is the point where revision and addition configuration attributes can be made such as enabling version control (noted in image below) and placing files into Terraform management. However, this is done later to emphasize each step.
Run
terraform applyto place the bucket in Terraform management.
Permalink4. Place bucket object into Terraform management
Currently, there is no way to import S3 objects like how a bucket can be imported. This has to be done explicitly by adding it in the configuration file.
🗄️ kk-s3-sample-import
 ┣ 📦.terraform
 ┣  📂 .terraform.lock.hcl
 ┣  📂 generated_resources.tf
 ┣  📂 imports.tf
 ┣  📂 provider.tf
 ┣  📂 terraform.tfstate
 ┗  📂 test-file.txt
generated_resources.tf
# __generated__ by Terraform
# Please review these resources and move them into your main configuration files.

# __generated__ by Terraform from "tf-import-test-bucket"
resource "aws_s3_bucket" "test_bucket" {
  bucket              = "tf-import-test-bucket"
  bucket_prefix       = null
  force_destroy       = null
  object_lock_enabled = false
  tags                = {}
  tags_all            = {}
}

resource "aws_s3_bucket_versioning" "versioning_example" {
  bucket = aws_s3_bucket.test_bucket.id
  versioning_configuration {
    status = "Enabled"
  }
}

resource "aws_s3_object" "hello_world" {
  bucket = aws_s3_bucket.test_bucket.id
  key    = "test-file.txt"
  source = "test-file.txt"
  etag = filemd5("test-file.txt")
  depends_on = [
    aws_s3_bucket_versioning.versioning_example
  ]
}

output "s3_hello_world_txt" {
  value = aws_s3_object.hello_world.etag
  description = "Etag of test-file.txt for version comparison"
}
It is good practice to enable file versioning in this specific use case of the S3 bucket and this is done by adding another resource into generated_resources.tf. This is done for simplicity purposes but ideally, the generated resource blocks should be separated into different tf files.
Also, since the test-file.txt also has to be under Terraform management, it is declared as a resource with a depends_on attribute to make sure that file versioning is enabled prior.
Run
terraform planandterraform applyAnd it would also be a good idea to check the md5 hash of the uploaded file. At this point, it is the same as the one created during the initial creation.
Run
terraform showand check S3 bucket in consoleThis should indicate that versioning is now enabled and that the file still has the same md5 hash as previously noted.
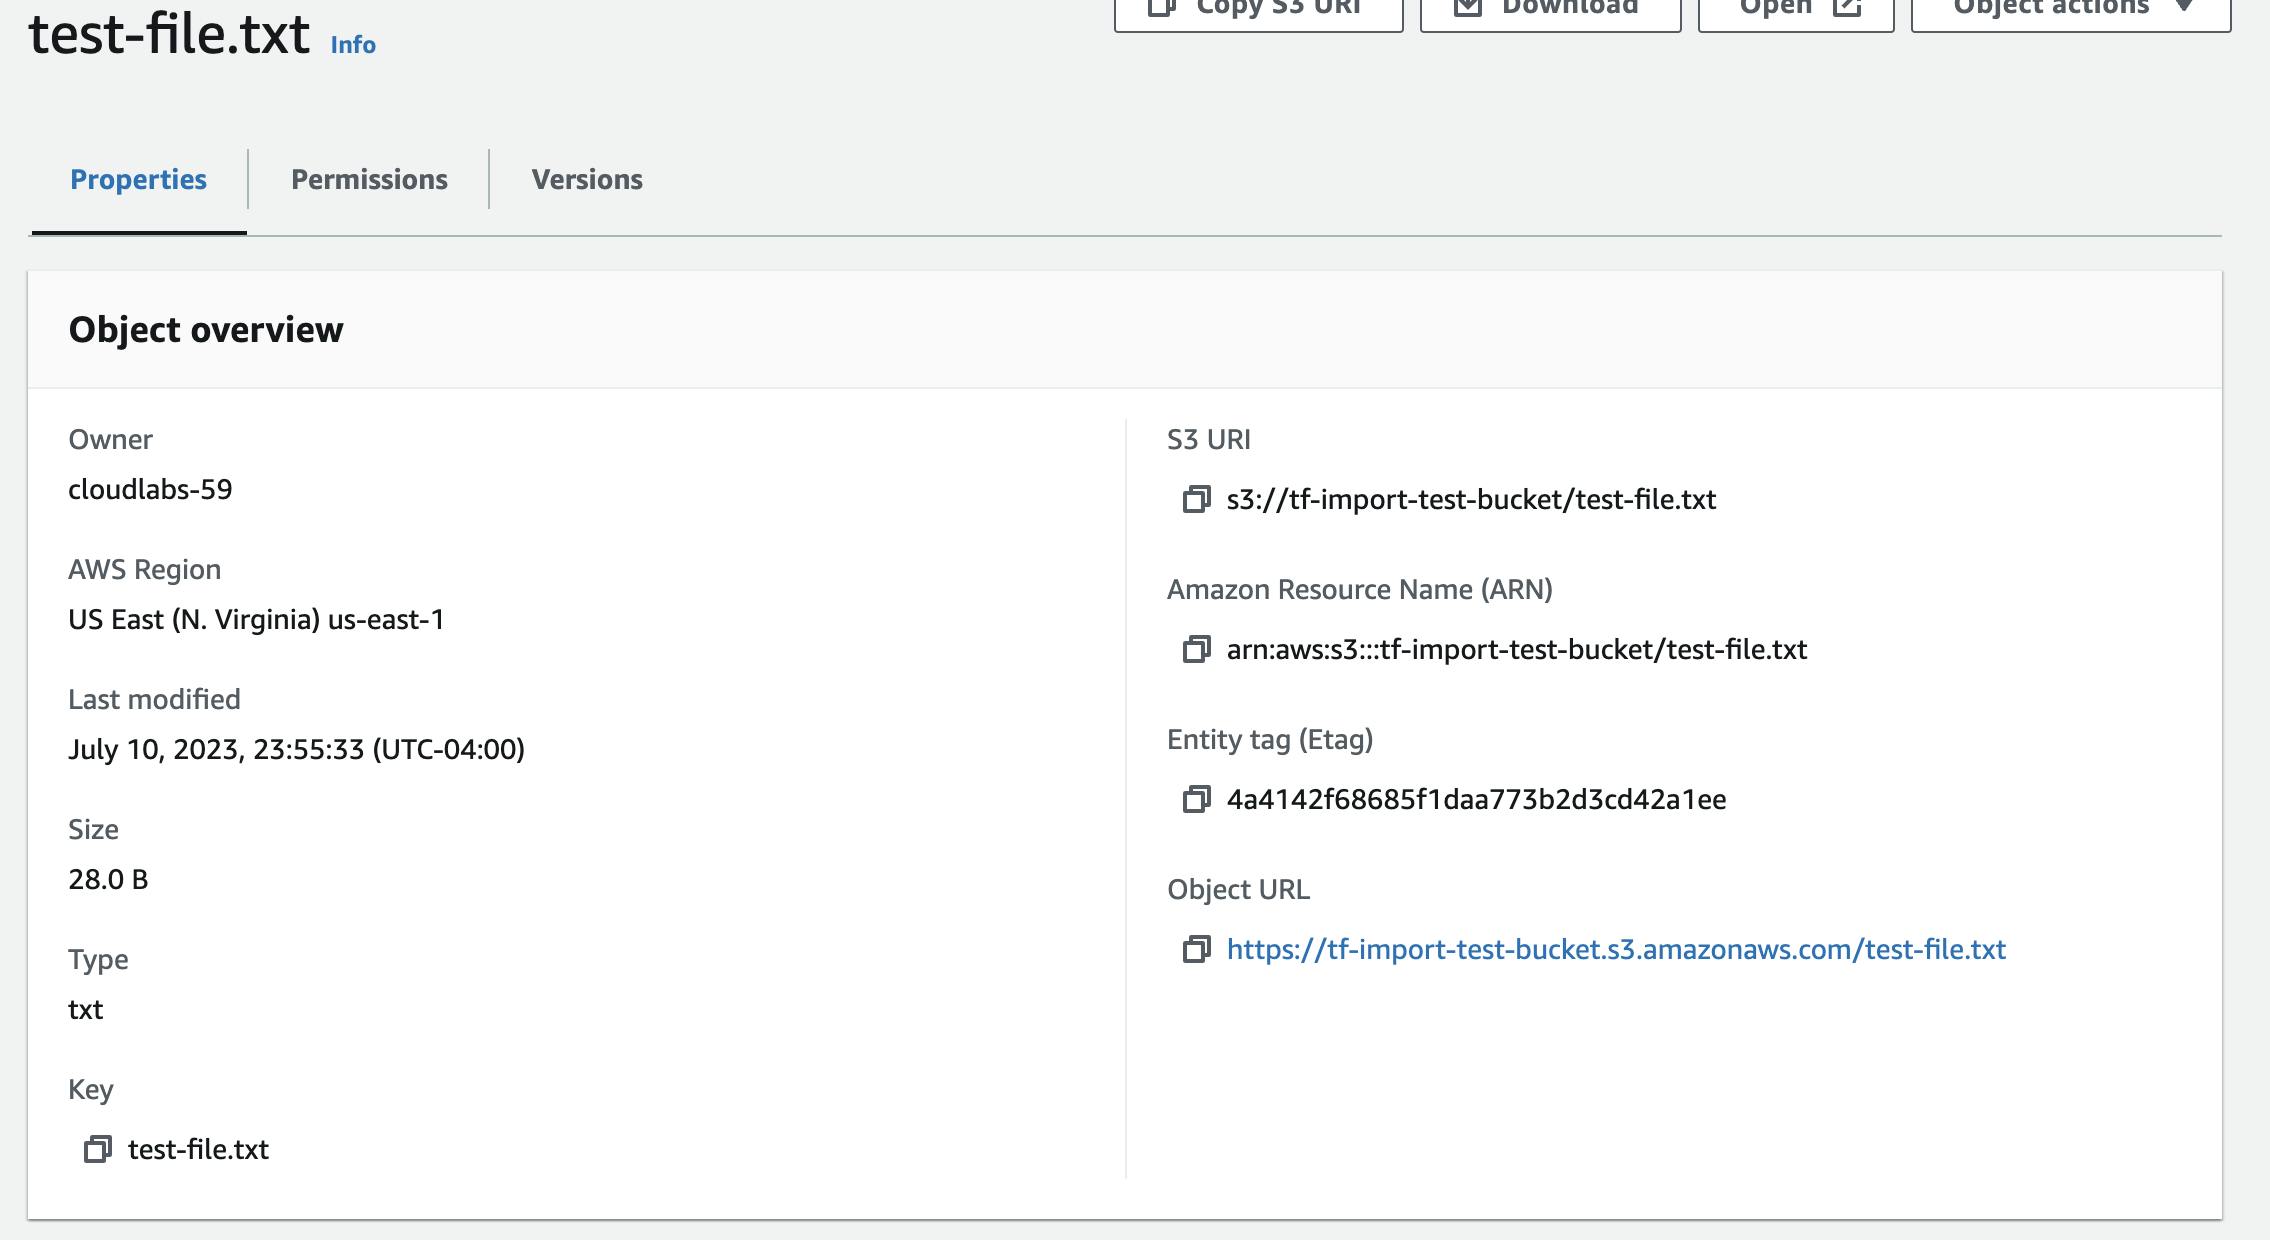
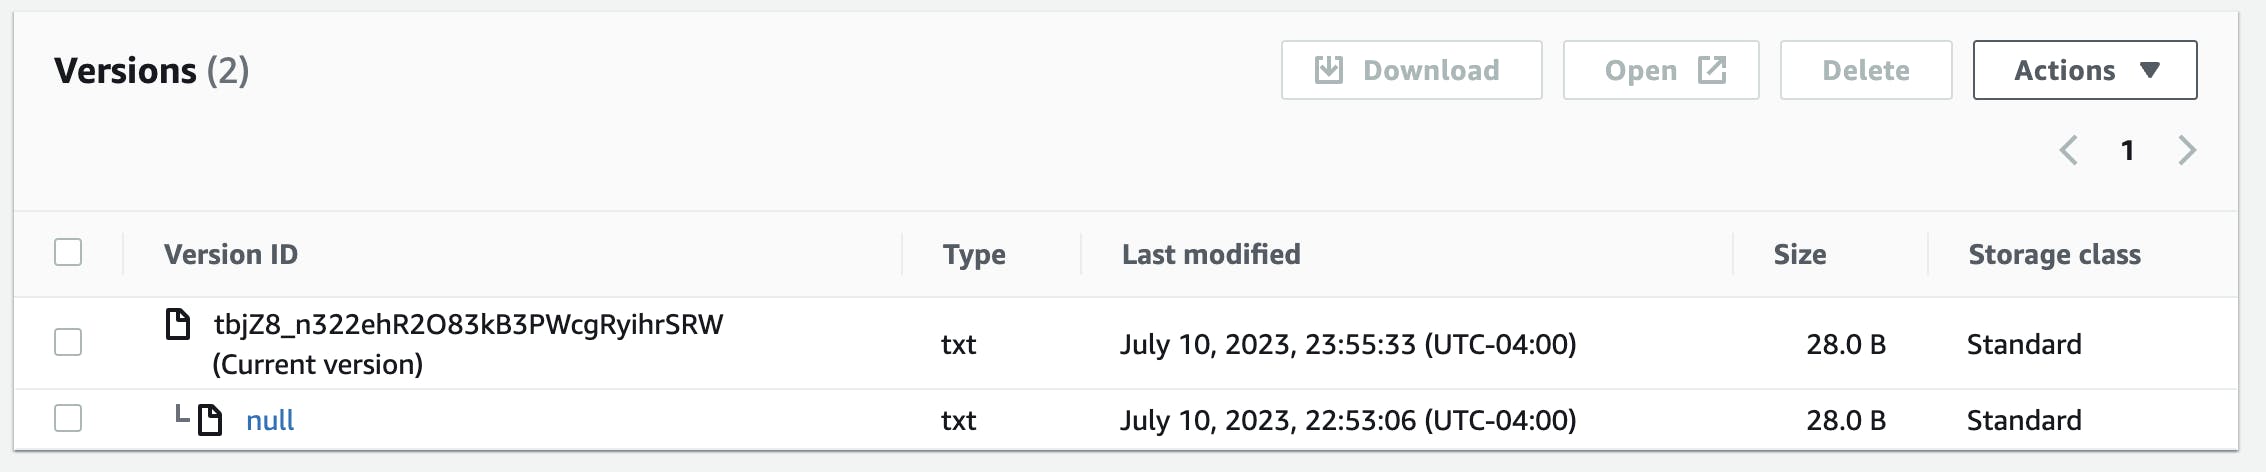
There are two versions of the file indicated but since they are the same file, the first one was simply overwritten.
Change
test-file.txtcontent and runterraform planandapply.HELLO WORLD! File version 2.
After running
terraform apply, check the file version in the console as well as its overview. The corresponding md5 hash has changed while the previous version is still available.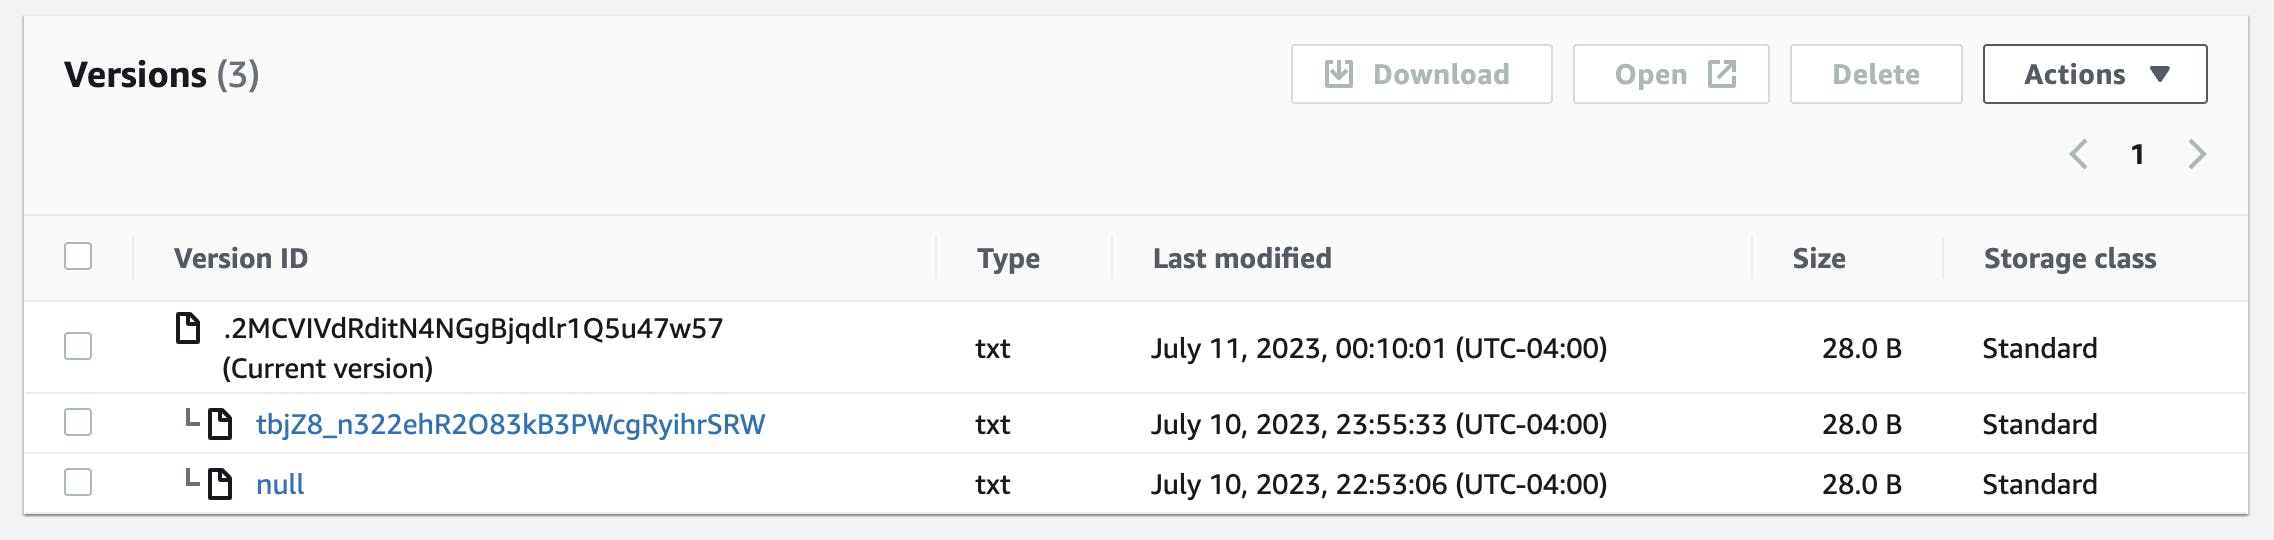
PermalinkConclusion
Being able to generate the resources automatically after applying the plan command saves time and simplifies the import process. The S3 example in this article demonstrates a straightforward use of the import blocks but each AWS service that is imported may have its own intricacies for proper resource alignment. For example, importing an EC2 instance and not checking if all attributes are correctly imported may cause the instance to be replaced. Thus, it is vital to test any changes before deploying changes to critical resources.